

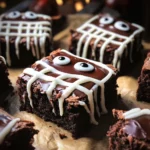
Almost too cute to eat, these spooky mummy brownies are a delightful Halloween treat that will charm both kids and adults. Perfect for parties, classroom events, or simply a fun baking day at home, these brownies combine rich chocolate flavor with an adorable design. The unique features of the spooky mummy theme make them stand out on any dessert table.
Why You’ll Love This Recipe
- Cute Presentation: These brownies are designed to look like mummies, complete with candy eyes, making them a hit for Halloween.
- Rich Chocolate Flavor: Made with dark chocolate chips and cocoa powder, each bite is packed with delicious chocolate goodness.
- Easy to Make: With simple ingredients and straightforward steps, this recipe is perfect for bakers of all skill levels.
- Versatile Treat: Ideal for Halloween parties, school events, or just a fun family dessert night.
- Kid-Friendly Fun: Involve the kids in decorating the brownies; they’ll love adding the bandages and attaching the candy eyes.
Tools and Preparation
Before diving into the recipe for spooky mummy brownies, gather your tools and equipment. Using the right tools makes the baking process smoother and more enjoyable.
Essential Tools and Equipment
- 9 x 9 inch cake pan
- Microwave-safe bowls
- Stand mixer (or hand mixer)
- Spatula
- Parchment paper
- Baking sheet
Importance of Each Tool
- Stand Mixer: This tool helps achieve a frothy egg mixture quickly, ensuring your brownies have a light texture.
- Parchment Paper: Lining your baking pan with parchment makes it easy to remove the brownies without sticking.
Ingredients
Almost too cute to eat. Honestly, I can’t eat them because they’re way too cute. But so delicious. It’s a moral battle.
- 10 tbsp butter
- 1 1/2 cups dark chocolate chips or chunks
- 1 cup sugar
- 1/4 cup dark brown sugar
- 3 eggs, at room temperature
- 1 tsp espresso powder (optional)
- 2 tsp vanilla extract
- 3/4 cup all purpose flour
- 1/3 cup unsweetened cocoa powder
- 1/2 tsp baking powder
- 1/2 tsp kosher salt
- 1 package candy eyes
- 20 oz semi-sweet or milk chocolate chips
- 1 tbsp coconut oil
- 1 cup powdered sugar
- 2-3 tbsp heavy cream, to thin
How to Make spooky mummy brownies
Step 1: Preheat the Oven
Preheat your oven to 350 degrees Fahrenheit. Line a 9 x 9 inch cake pan with parchment paper, leaving some overhang on the edges.
Step 2: Melt Chocolate and Butter
In a microwave-safe bowl, heat 1 cup of chocolate chips along with the butter for about 1 minute. Stir until smooth; if necessary, microwave for an additional 20 seconds.
Step 3: Prepare Egg Mixture
In a stand mixer bowl, beat the eggs until frothy (about 2–3 minutes). Gradually stream in the melted chocolate mixture while mixing until fully incorporated.
Step 4: Combine Dry Ingredients
Add flour, cocoa powder, baking powder, and salt to the egg mixture. Mix until just combined. Gently fold in the remaining 1/2 cup of chocolate chips.
Step 5: Bake Brownies
Spread the batter evenly into your prepared baking pan using a spatula. Bake for approximately 25–30 minutes or until a toothpick inserted comes out with moist crumbs. Let cool before cutting into squares.
Step 6: Coat Brownies
Place chocolate chips and coconut oil in a large microwave-safe bowl. Heat for about 1 minute and stir until smooth. Let cool slightly before dipping each brownie into this mixture; place them on a parchment-lined baking sheet afterward.
Step 7: Chill Brownies
Refrigerate dipped brownies for about 15 minutes to allow the coating to set.
Step 8: Prepare Bandage Icing
In another bowl, whisk together powdered sugar and heavy cream until you reach a thick icing consistency. Transfer this icing into a piping bag or zip-top bag with one corner snipped off.
Step 9: Decorate Mummy Brownies
Once chilled, use your icing to create bandage patterns on top of each brownie. Add candy eyes before letting everything harden for about 10 minutes. Enjoy your spooky mummy brownies!
How to Serve spooky mummy brownies
These spooky mummy brownies are perfect for any Halloween gathering or just for fun! They not only taste delicious but also look adorable, making them a hit with kids and adults alike.
Individual Treats
- Serve each brownie on its own plate for a delightful individual treat.
- Add a small scoop of vanilla ice cream on the side for a delightful contrast.
Halloween Dessert Table
- Arrange the brownies on a festive Halloween-themed platter.
- Surround with other treats like mini pumpkins and candy corn for a vibrant display.
Party Favors
- Wrap individual brownies in clear cellophane bags tied with orange ribbons.
- Hand them out as party favors for guests to take home.
Themed Snack Bar
- Create a DIY brownie bar where guests can add toppings like sprinkles or whipped cream.
- Provide different sauces like caramel or chocolate for extra indulgence.
Movie Night Delight
- Pair the brownies with popcorn and drinks for a cozy movie night.
- Choose classic Halloween movies to set the mood while enjoying these treats.

How to Perfect spooky mummy brownies
Perfecting your spooky mummy brownies is all about technique and attention to detail. Follow these tips to ensure they come out just right!
- Use room temperature eggs: This helps the batter mix more evenly, leading to a better texture.
- Don’t overmix the batter: Mix until just combined to avoid tough brownies.
- Check for doneness: Insert a toothpick; it should come out with a few moist crumbs, not wet batter.
- Cool completely before decorating: Allowing the brownies to cool ensures the icing won’t melt when applied.
- Adjust icing consistency: If your icing is too thick, gradually add more cream until it reaches the desired thickness.
- Store properly: Keep leftover brownies in an airtight container at room temperature or in the fridge to maintain freshness.
Best Side Dishes for spooky mummy brownies
Complement your spooky mummy brownies with some delightful side dishes. These options will enhance your dessert experience and make your gathering even more festive!
- Witch’s Brew Hot Chocolate: A rich hot chocolate topped with marshmallows, perfect for warming up on chilly nights.
- Pumpkin Spice Cookies: Soft cookies infused with pumpkin spice that pair well with chocolate treats.
- Caramel Apple Slices: Fresh apple slices drizzled with caramel sauce offer a sweet and crunchy contrast.
- Candy Corn Cupcakes: Fun cupcakes decorated with candy corn that align perfectly with the Halloween theme.
- Cheese Platter: A variety of cheeses and crackers provide savory balance against the sweetness of the brownies.
- Fruit Salad: A refreshing fruit salad can cleanse the palate after indulging in rich desserts like brownies.
- Spooky Cheese Quesadillas: Cut into bat shapes, these cheesy snacks will delight both kids and adults at your gathering.
- Ghostly Marshmallow Pops: Marshmallows dipped in white chocolate and decorated as ghosts make an adorable addition.
Common Mistakes to Avoid
When making spooky mummy brownies, it’s easy to stumble into some common pitfalls. Here’s how to avoid them.
- Skipping the parchment paper: Not lining the pan can lead to brownies sticking. Always use parchment for easy removal.
- Overmixing the batter: This can result in tough brownies. Mix just until ingredients are combined for a fudgy texture.
- Ignoring cooling time: Cutting brownies too soon makes them fall apart. Allow them to cool completely before slicing.
- Not measuring ingredients accurately: Incorrect measurements can affect taste and texture. Use a kitchen scale or measuring cups for precision.
- Underestimating chilling time: Skipping the fridge step can make coating messy. Chill the brownies properly to get clean chocolate coverage.
Storage & Reheating Instructions
Refrigerator Storage
- Store spooky mummy brownies in an airtight container.
- They will last up to a week in the refrigerator.
Freezing spooky mummy brownies
- Place brownies in an airtight container or freeze in plastic wrap.
- They can be frozen for up to 3 months.
Reheating spooky mummy brownies
- Oven: Preheat to 350°F and warm for about 10 minutes for a fresh taste.
- Microwave: Heat on medium power for 10-15 seconds until warm.
- Stovetop: Place brownies in a skillet over low heat, cover, and warm gently.
Frequently Asked Questions
Here are some common questions about spooky mummy brownies that you might have.
What makes these spooky mummy brownies special?
These spooky mummy brownies are not only delicious but also visually fun, making them perfect for Halloween celebrations!
Can I customize spooky mummy brownies?
Absolutely! You can add nuts, different types of chocolate chips, or even swirl in peanut butter for extra flavor.
How do I store leftover spooky mummy brownies?
Store them in an airtight container in the refrigerator for up to a week or freeze them for longer storage.
Are there any alternatives to chocolate?
Yes! You can use white chocolate for a different flavor or even colored candy melts for fun variations.
How do I make spooky mummy brownies gluten-free?
Substitute all-purpose flour with a gluten-free blend and ensure all other ingredients are gluten-free certified.
Final Thoughts
Spooky mummy brownies are a delightful treat that combines fun presentation with rich chocolate flavor. They’re perfect for Halloween gatherings or any festive occasion. Feel free to customize your batch with different toppings or mix-ins. Try making these adorable treats today, and enjoy their charm and taste!
Spooky Mummy Brownies
- Total Time: 50 minutes
- Yield: Serves approximately 16 brownies 1x
Description
Spooky mummy brownies are the perfect Halloween treat that will delight both kids and adults alike. These charming desserts combine rich chocolate flavor with a fun mummy design, making them a standout addition to any festive gathering. With candy eyes and white icing ‘bandages,’ they are not only delicious but also visually appealing. This easy recipe is perfect for Halloween parties, classroom celebrations, or simply a cozy baking day at home. Involve the kids in decorating for added fun!
Ingredients
- 10 tbsp butter
- 1 1/2 cups dark chocolate chips
- 1 cup sugar
- 3 eggs
- 3/4 cup all-purpose flour
- 1/3 cup cocoa powder
- Candy eyes for decoration
- 20 oz semi-sweet chocolate chips for coating
Instructions
- Preheat your oven to 350°F and line a 9 x 9 inch cake pan with parchment paper.
- Melt together butter and 1 cup of dark chocolate chips in a microwave-safe bowl until smooth.
- In a stand mixer, beat eggs until frothy, then mix in the melted chocolate mixture.
- Combine flour, cocoa powder, and sugar into the egg mixture, mixing until just combined.
- Spread batter into the prepared pan and bake for 25-30 minutes.
- Cool brownies before dipping them in melted chocolate mixed with coconut oil.
- Chill coated brownies in the refrigerator for about 15 minutes, then decorate with icing and candy eyes.
- Prep Time: 20 minutes
- Cook Time: 30 minutes
- Category: Dessert
- Method: Baking
- Cuisine: American
Nutrition
- Serving Size: 1 brownie (50g)
- Calories: 220
- Sugar: 18g
- Sodium: 60mg
- Fat: 12g
- Saturated Fat: 7g
- Unsaturated Fat: 4g
- Trans Fat: 0g
- Carbohydrates: 26g
- Fiber: 2g
- Protein: 3g
- Cholesterol: 40mg
Leave a Comment